
Singer 12, 12K, 13 & 13K Sewing Machines Shuttle Threading & Tension Setting
Insert a bobbin wound with thread into the shuttle by placing one end next to the shuttle point and then pressing down on the other end so that it snaps into place.
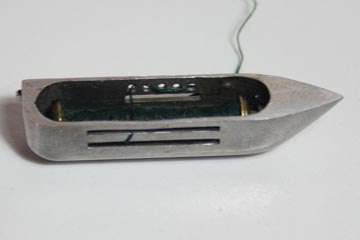
12K Shuttle & Bobbin
When inserting the bobbin make sure that the thread draws towards the side of the shuttle with 2 slots along its length. Pass the thread out through the lower slot and then back in through the top slot, and then out again through the tension hole nearest the round end in the opposite side of the shuttle.
Working towards the point end, pass the thread through as many tension holes as necessary to obtain the correct tension. The thread must always pass through the last hole, but can go either inwards or outwards. If it goes inwards, then it must pass out again through the slot that runs parallel to the tension holes. Finally in every case it must be passed under the spring on the outside of the shuttle.
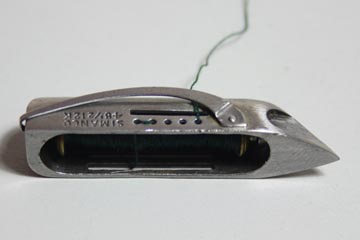
12K Shuttle Using 3 Tension Holes
Tension adjustment of the shuttle thread is a matter of trial and error, but passing the thread through 3 of the 5 holes is a good starting point for medium fabrics. Lighter or heavier fabrics will usually require lighter or heavier tensions accordingly.